


MC5 telescope controller
Table of content
Introduction
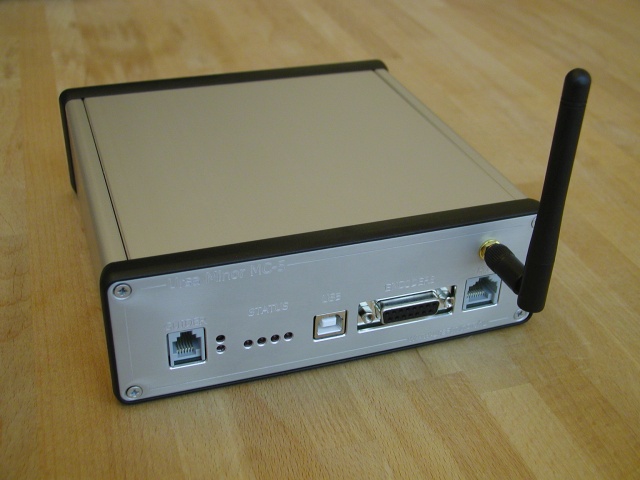
MC5 is an advanced telescope controller which can use absolute encoders for both position feedback and closed loop tracking.

Features
- Freely configurable to most of the telescope mounts
- Easy to use Hand Control Unit with graphic display
- Internal astronomical database with 50000 objects
- Ascom compatible: Compatible with most of the planetarium programs with dedicated Ascom driver.
- Battery backed real time clock. Does not forget the time and place!
- Smooth operation: 256x microstepping.
- Absolute encoders: MC5 can handle absolute encoders (Heidenhain 25 bit) on both axis.
- Thanks to the encoders, the system is completely failsafe: It can know the exact position of the telescope even after a software problem or accidential restart. It prevents the accidential pier-hit.
- MC5 can do closed loop tracking control. It gives you exceptional accuracy:
- Tracking error within +/- 1 arcsecond with Heidenhain 25 bit encoder
- Tracking error within +/- 0.2 arcsecond with Renishaw 32 bit encoder
- MC5 compatible with Ursa Minor Hand Controller: It has a 128 x 64 pixel graphic display with user friendly menu and an astronomical database with aprox. 50000 objects.
- Firmware can be upgraded by the end user.
- Astronomical database of the hand controller also can be upgraded.
- Compatibility with most of the planetarium programs: MC5 has a dedicated ASCOM driver with parking and Meridian flip support.
- Ursa Minor Pro planetarium program developed directly to fully support MC3 and MC5 controllers.
Initial setup using computer (With the MCConfig program)
The MC5 device normally comes pre-configured for the Fornax mounts. (Exception: if you buy with a different mount and also ask us to pre-configure it.) You may need to adjust settings for your equipment even if you already have a Fornax mount.
A program called “MCConfig” serves to setup the mount.
The current version of the program is 2.6. You can download it from the downloads page
The program requires no installation. Just unzip the zip file. The program's user interface looks like this:

Steps of initial configuration
Before doing anything, consider the pier side of the mount. We recommend the following initial position:

The telescope is at the eastern side of the mount and looks to the Equator. The counterweight shaft is horizontal and points to the West.
The MCConfig program assumes this initial position at the beginning.
- Connect the MC5-controller to your computer, if you have not already done so. (via a USB cable)
- Turn on the MC5-controller and start the program “mcconfig”.
- Select the COM port number (that you found out after the installation of the FTDI driver) from the drop-down list in the upper left corner of the window. The COM number can be discovered by this way.
- Select the Baud rate (this is the speed of communication). MC3 needs 9600 Baud. MC5 needs 115200 Baud.
- Press the "Connect" button and wait until the connection is established. Below the Connect button the following message would be displayed "Connected".
- Once connected, the program reads the settings from the MC5 and accordingly displays them in the window.
- At first, set up your geographic position. The geographic position is stored inside the motor controller. Press the
"Advanced settings" button, and enter the coordinate values into the fields.
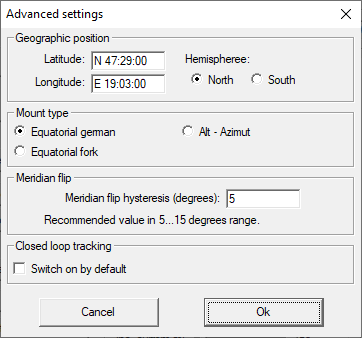
- Please also select the correct hemisphere! (Entering the proper geographic latitude is not enough. The hemisphere selection is also important.)
- Please check and set the type of the mount (german equatorial or fork mount). Do not choose the alt-azimuth option, as the controller does not support this kind of mount yet. This option is reserved for future developments.)
- The "Closed loop tracking" should be unchecked now. I recommend use the closed loop tracking only after you finished all the basic initialization and you are familiar with the use of MC5. This function is available only for MC5 and not available for MC3.
- Close the advanced settings window by pressing the "Ok" and you should see the "Settings done." message in the status field.
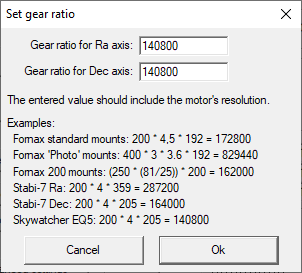
- Check the gear ratio and modify it if required. The values displayed on the screen are the gear ratio multiplied
with motor steps.
Example: A Standard Fornax 51 mount has a 192 teeth worm gear, a belt drive with 4.5 ratio and a 200 step per revolution motor. The entered value should be: 192 x 4.5 x 200 = 172800.If your mount's total ratio is different than the displayed value, press the "Set gear ratio" button and give the correct values in the popup window.Important: After changing the gear ratio, all settings should be reviewed, and the park position must be set again. (Changing gear ratio resets the park position.)
- With the help of the four direction buttons at the top left corner of the window you can now try to move the motors. When you click the arrow button the mount would start to move in that direction. To stop it you would have to click on the STOP button that is placed in between the four direction buttons. Until you click on the STOP button, the motors will NOT stop moving!
- Make sure that the RA axis of your mount is connected to the right port and that it tracks in the direction of East to West. First, stop the motor (if you have not done yet), then press the button “Track On”. Tracking starts.
- Check out if it tracks in the right direction and whether the object remains in the telescope's field of view.
- If the motor rotates in the opposite direction then thick the “Reverse Rotation” checkbox under the RA panel.
- Now we can proceed with the declination motor. You should pay an extra attention because the rotation of the
declination motor is dependeing on the pier side. For the initial setting, the telescope's
orientation should be the similar as the eastern position displayed above. Ensure, thet the orientation of the mount is
similar! The telescope should be at the eastern side of the mount and looks to the Equator. The counterweight shaft
should be horizontal and points to the West. If not so, move the telescope into this orientation. Press the "Init
scope" button!
Choose the "Default east - Equator" option, and press "Set this position" button.
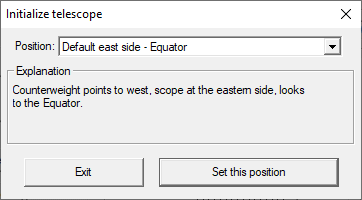
- You should see the "Telescope synchronized to the given position." message in the status field.
- Now try to move the declination motor: Press the up button, and the telescope should move to north. If it is not so, please reverse it by checking the check box at the upper part of the declination panel on the screen.
- Now check the maximum speed of the motors. It can be adjusted independently for both axis. At first, adjust the
slider just below the direction buttons to its rightmost position.
- Give a value for max. speed for the RA motor at the RA panel with the uppermost slider.
- Now try the movement of the motor.
- If the speed is too fast, the motor will stop and give a noise. This means it ran out of synchron.
- In such case you should stop it completelly, give a bit smaller max speed and test it again.
- Adjust the max speed of the declination motor similarly.
- Now set up the park position. As you processed the steps of the setup above, the telescope is at the eastern side
of the pier. If the desired park position is also in the eastern side the process is simple. If the park position is at
the opposite side, a few more steps required.
If the park position is at the same side of the pier
- Move the telescope to the park position
- Press the "Define park pos" button!
If the park position is at the opposite side of the pier
- Move the scope to the opposite side of the pier, to the desired park position (by buttons, or by opened clutch)
- As the scope is at the opposite side, the declination motor's rotation is not correct. Do not reverse it now!
- Press the "Init scope" button and choose one default position which is the closest to your desired park position.
- Press the "Define park pos" button!
- If you have completed all the above necessary steps/settings, there is one important step remains: You have to store the settings in the memory of MC5. To do this, press the “Save settings into Mc.” button. When you turn the MC5 on next time, it’ll work with the new settings.
- If you have finished with setting it up, disconnect it by clicking on the “Disconnect” button and then turn off the MC5.
Initial configuration of the absolute encoders
OC5 and MC5 telescope controllers can use absolute encoders for both position feedback and closed loop tracking.
The calibration process is described on separate page.